Waxing Paper

The Waxing Process,

As an aspiring bookbinder for a couple of years now I’m always on the hint for interesting and innovative ways to cover and decorate the handmade books and journals that we make.

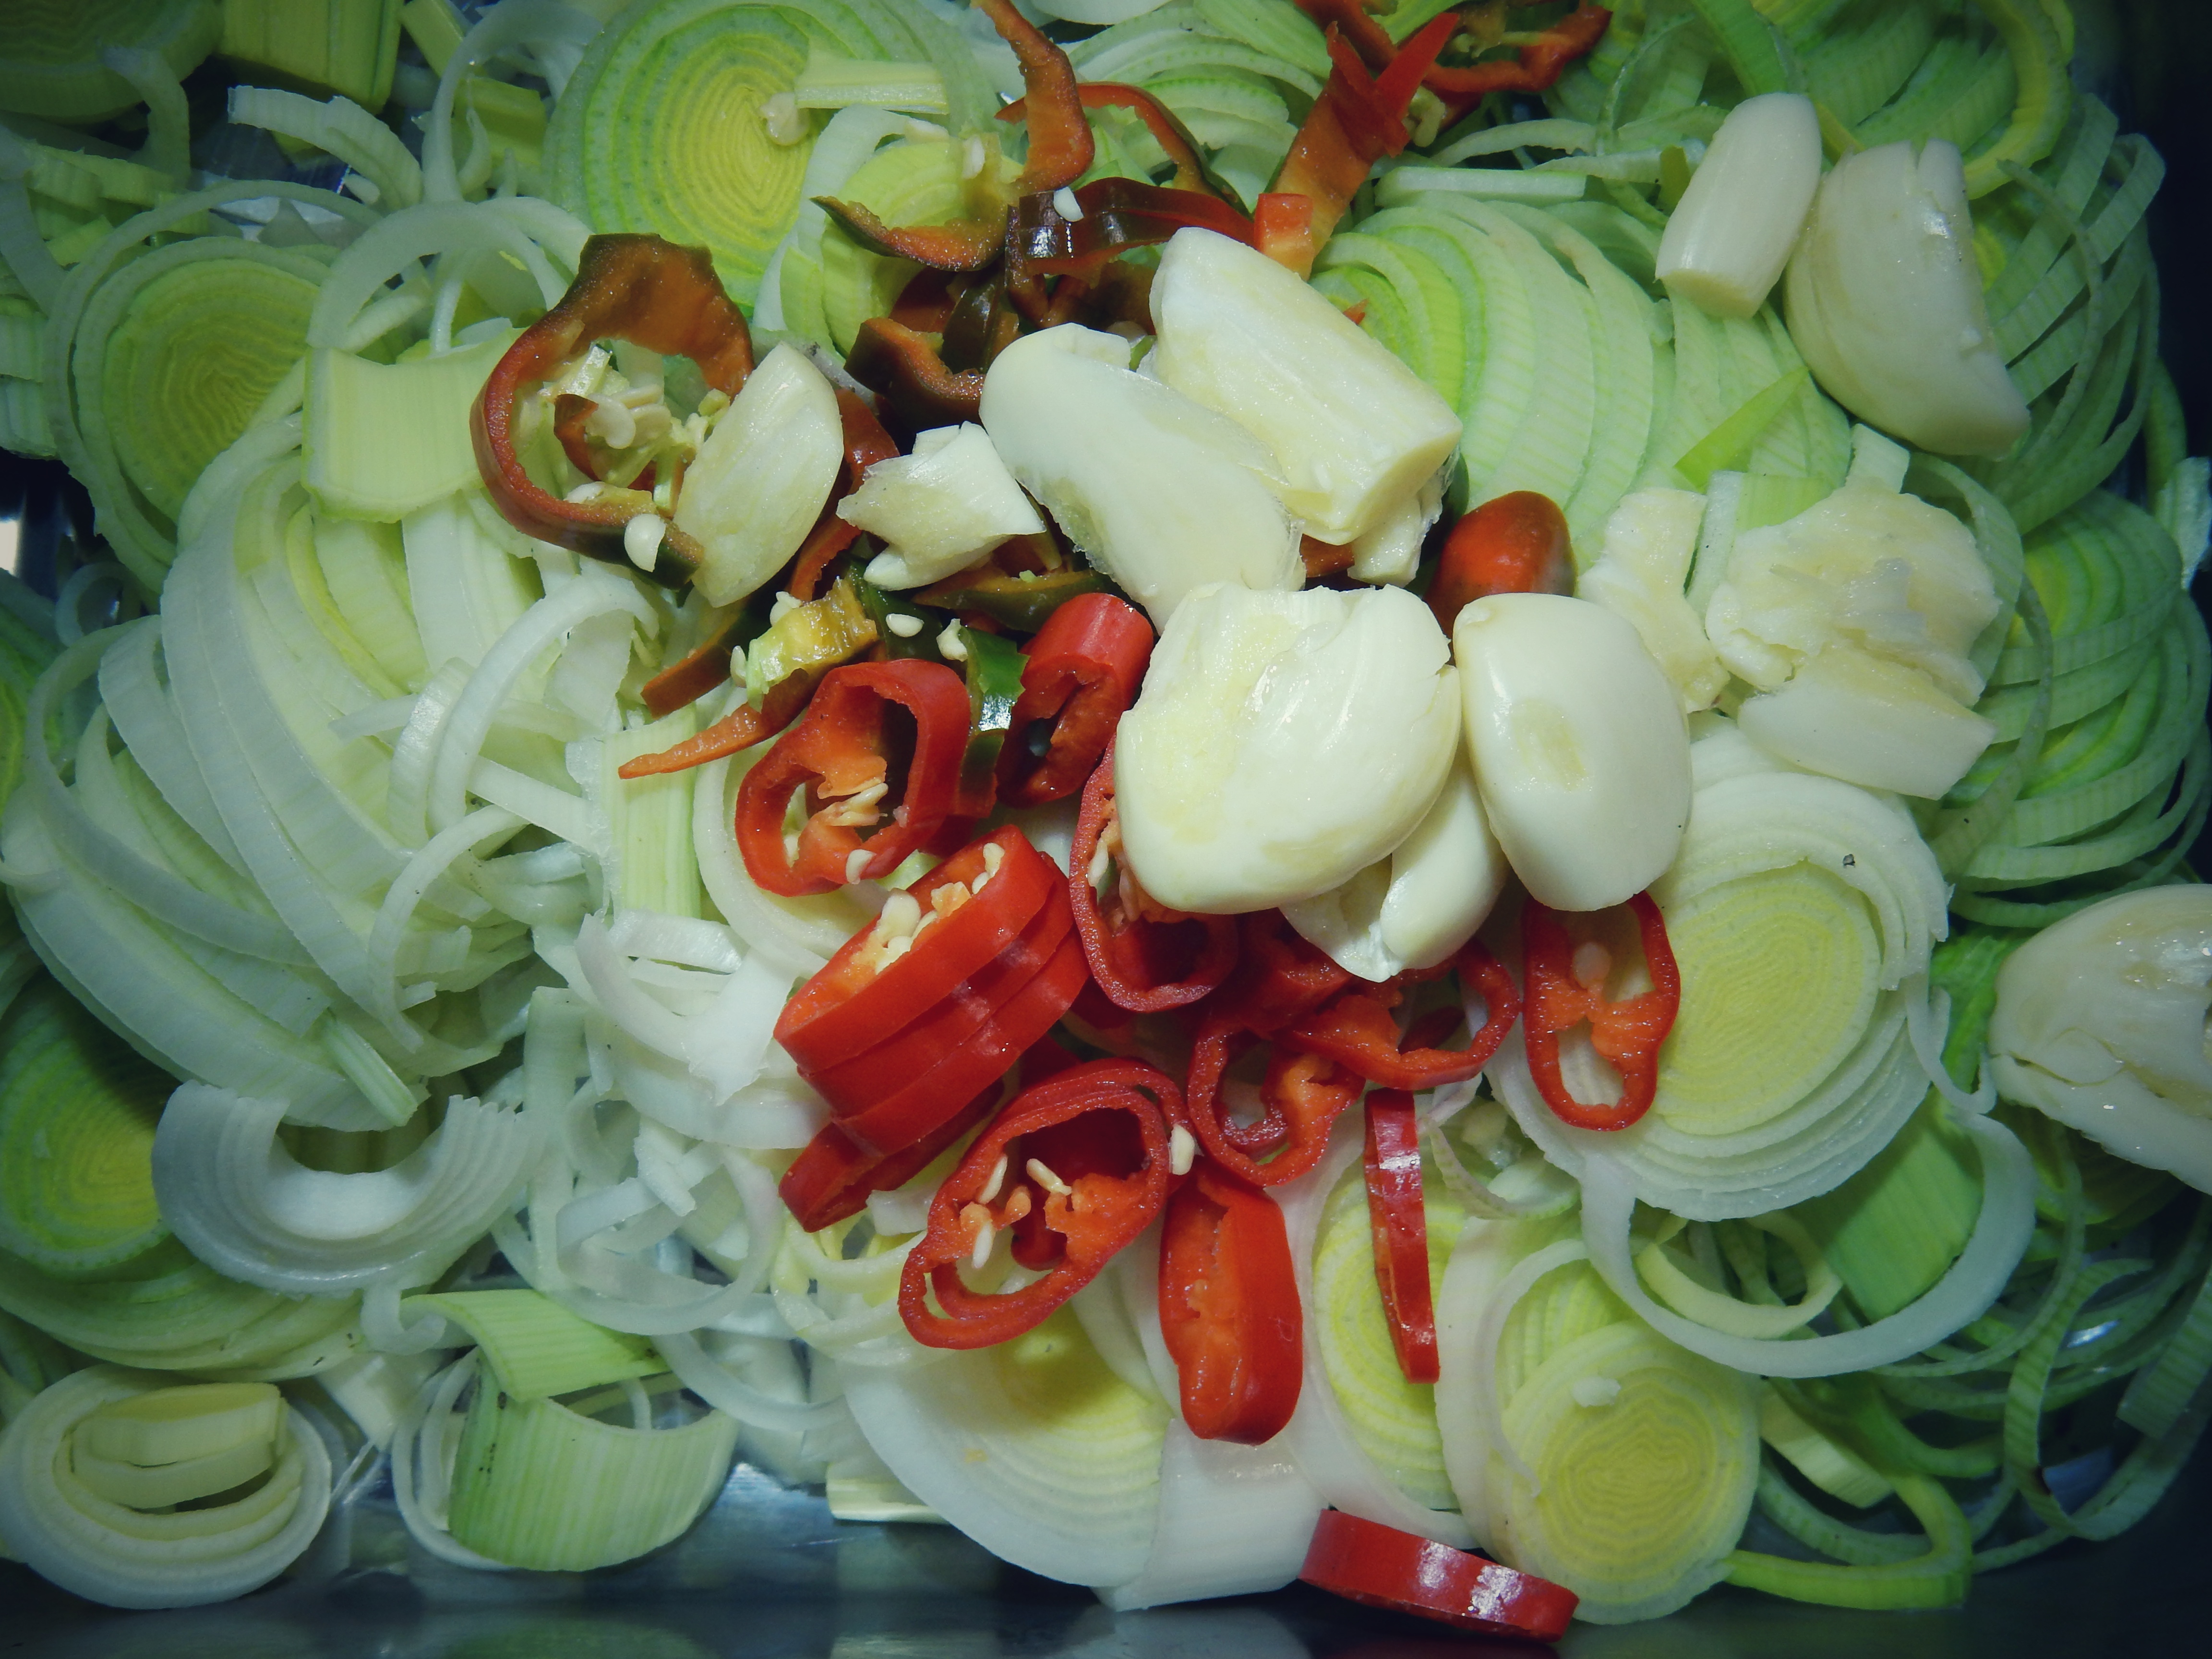
A few months ago whilst shopping in Fitzroy, Victoria for some endpapers for a commission journal that my daughter and I were making for a client, we happened across some beautiful handmade papers from Nepal which featured embedded dried flowers and the had most awesome texture. We settled on a few sheets for the commission and grabbed another couple of pages for play. 

The Nepalese paper we bought is called Lokta Paper and is made from the dense fibrous bark of the Nepalese paper plant or Lokta bush. The Lokta Bush regenerates every 4 to 6 years after being harvested and cut about 6 inches from the ground. This tree free paper provides a viable revenue stream for nepalese artisans in urban and rural areas.

The Lokta plants fibres are long and supple and result in a soft paper which takes colouring and decoration beautifully and has a beautiful deckled edge when torn.

For our bookbinding applications we primarily used the lokta paper as endpapers in books and I found that it works best if backed with 125 gsm acid free cartridge paper. To mount the lokta paper we use an archival grade flexible PVA adhesive. 

I decided to try the lokta paper as a book covering materials for some tape bound hand sewn journals that I had designed as I wanted them to have an elegant, handmade feel about them. I knew that the raw lokta paper was not going to be strong enough to withstand  repeated handling so I knew I needed to come up with a simple organic finish to protect and enhance these beautiful papers.

I drew on my woodworking and object conservation experience and decided that as the lokta paper was an organic material, lacquers and varnishes were not going to cut it so I settled on an organic wax from an Australian manufacturer to protect the papers. 

When I worked as a furniture maker I used to make a wax based on a combination of beeswax and canuba wax on the furniture I made, then I discovered Cabinet Makers Wax made by Gilly Stephenson in Western Australia. 

I quickly decided that my limited workshop time was better spent making furniture rather than making wax so I decided to run with the Gilly Stephenson product.

This wax gives a beautiful lustrous and soft finish and durable finish on timber and It can be buffed to a high shine so I felt the chance it would work on fibrous papers would be very good.

  I knew that I needed to to some tests to check how well the wax would work so I backed some samples of lokta paper on to 125 gsm acid free cartridge paper using an archival flexible PVA adhesive then when dry, mounted the samples to pre sanded 9mm plywood blocks.

 I backed the lokta paper on to cartridge paper to give it more strength to withstand the buffing during the waxing process and to limit the translucency of light coloured lokta paper when being placed on a darker substrate.

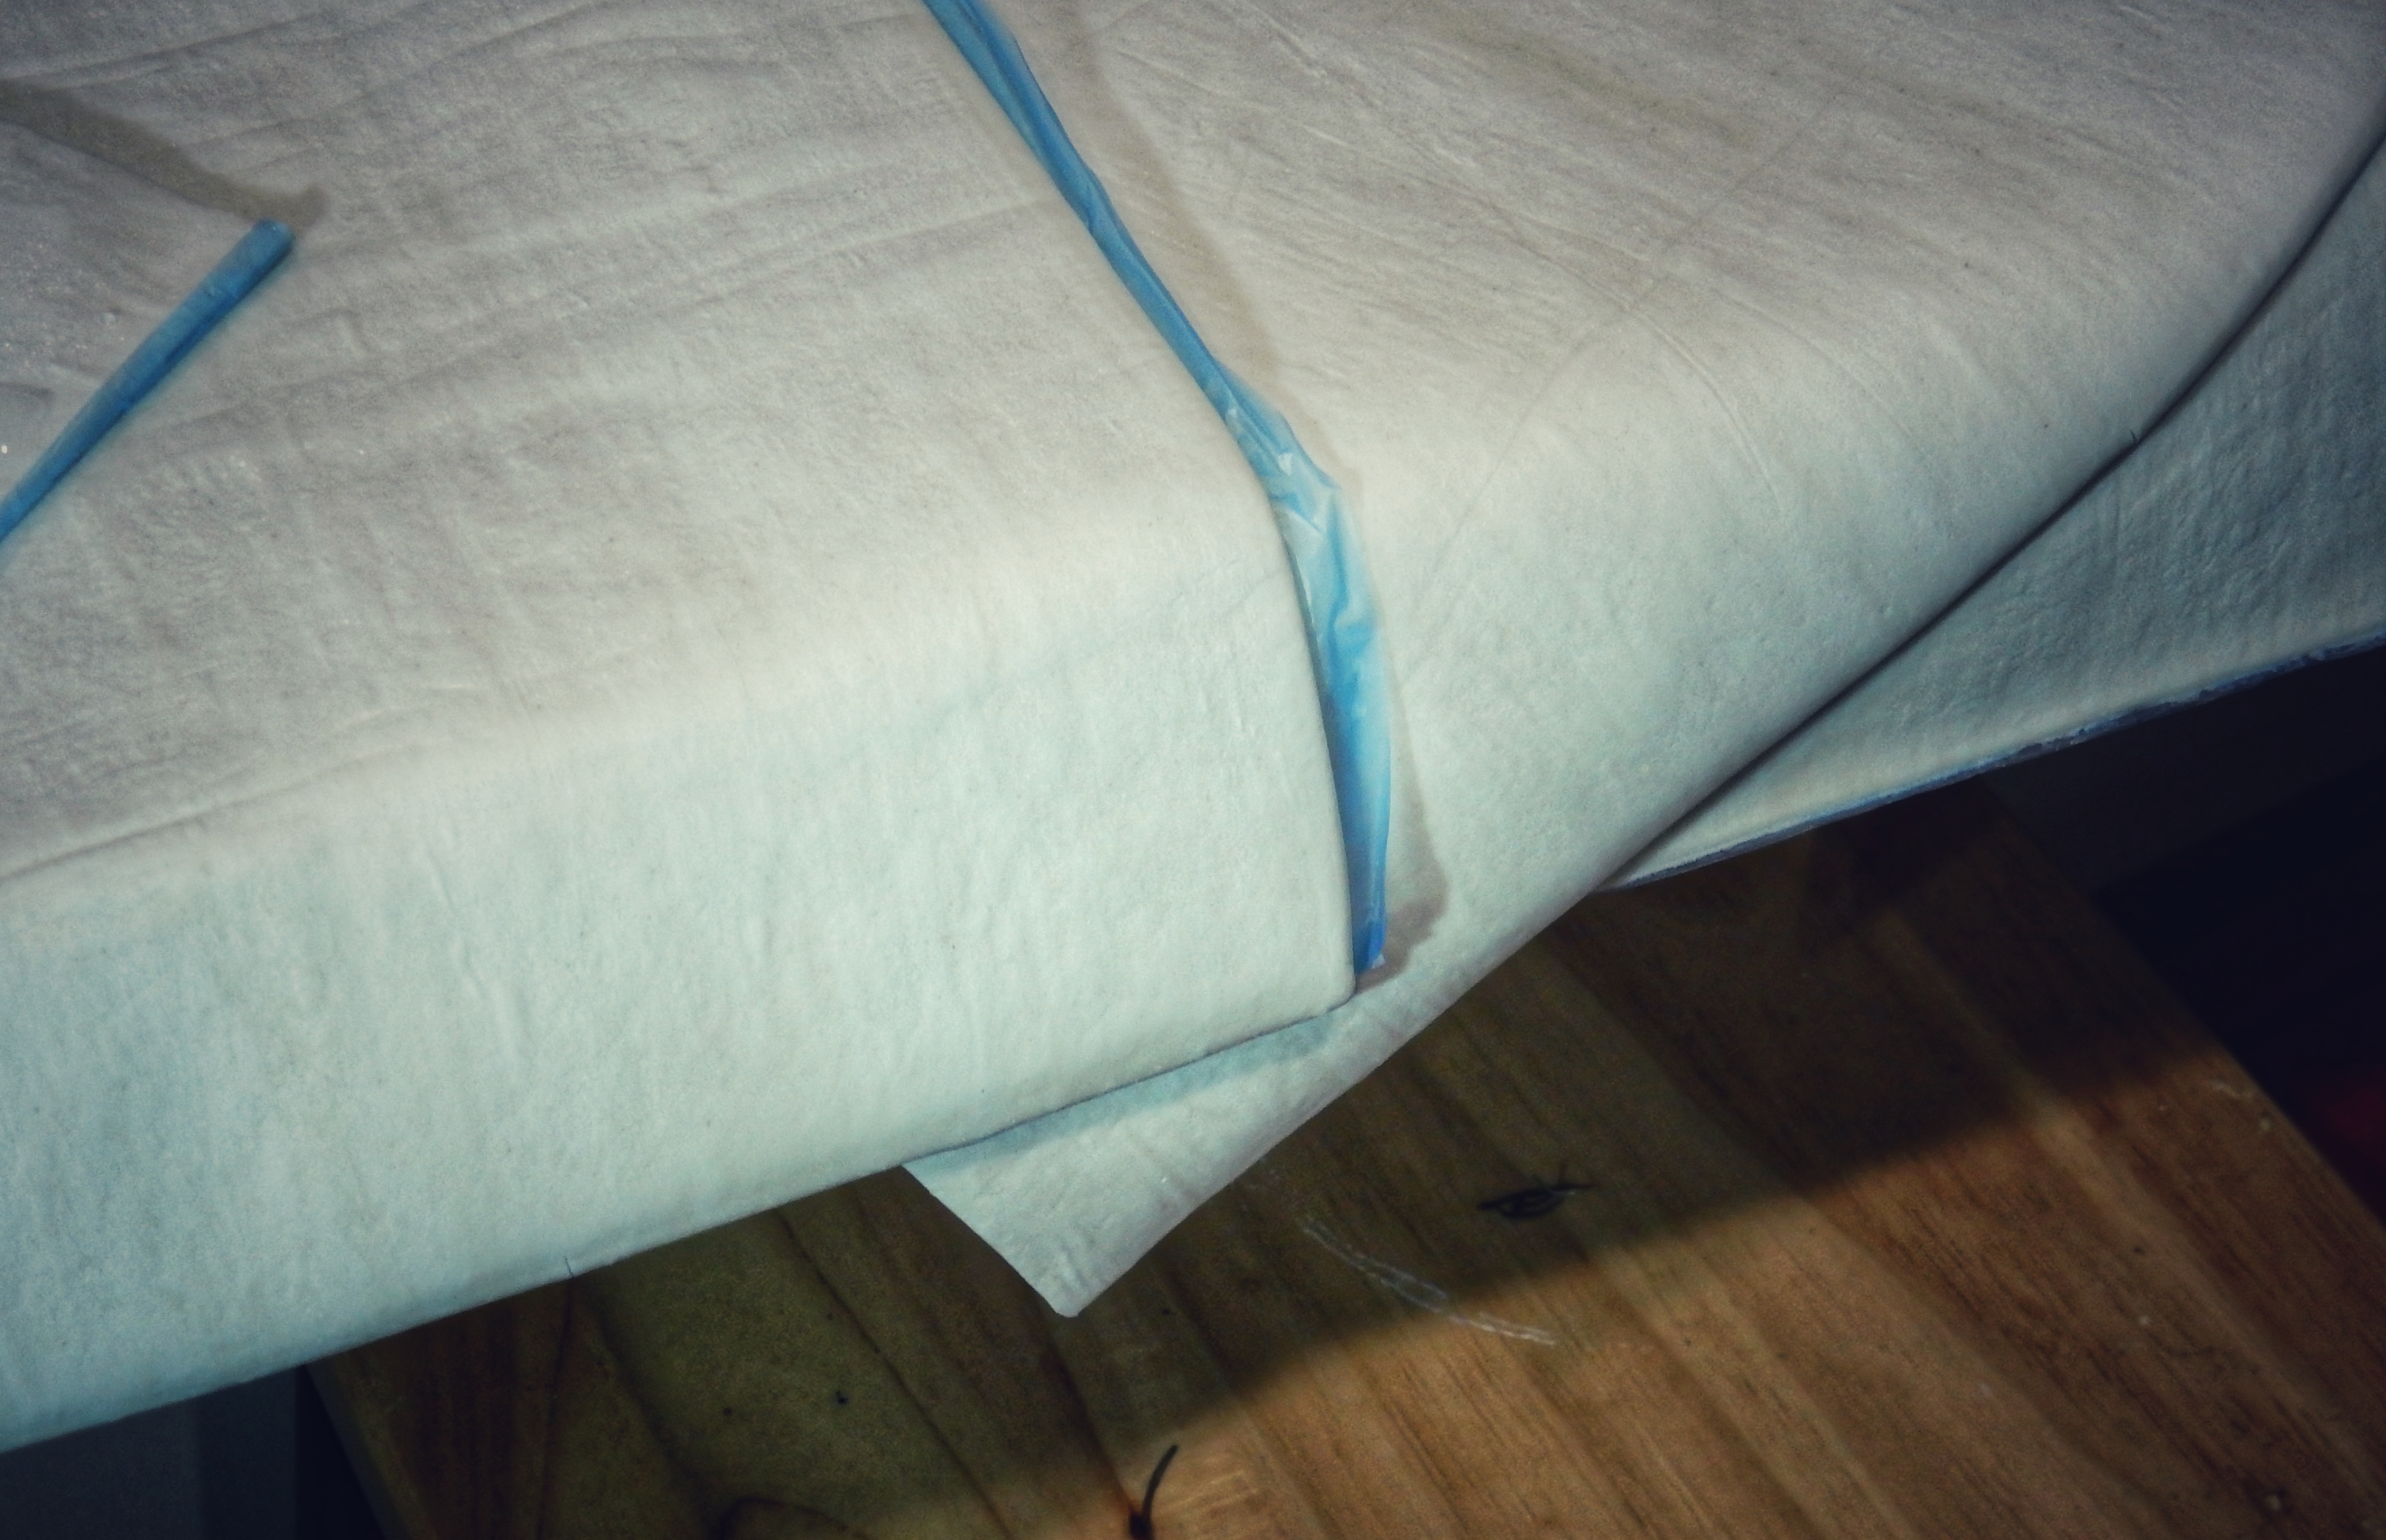
The top photo shows the lokta paper prior to waxing and the bottom photos show the paper after two coats of wax have been applied. 

The cabinet makers wax is a combination of beeswax and canuba wax in a gum turpentine base.

Beeswax on its own is never fully dries and can become highly tacky in hot climates.

Canuba wax on its own is extremely hard to use in its natural state

Combining the two in a gum turps base gives you a building wax which dries to a durable finish which can be buffed to a high shine and with repeated applications builds a flat surface which enhances the natural texture of the surface its been applied to.

I waxed the samples applying two coats of cabinet makers wax over a 24 hour period and was absolutely stoked with the results.

The natural texture and colour of the paper was enhanced by the finish and the samples had a beautiful feel in hand.
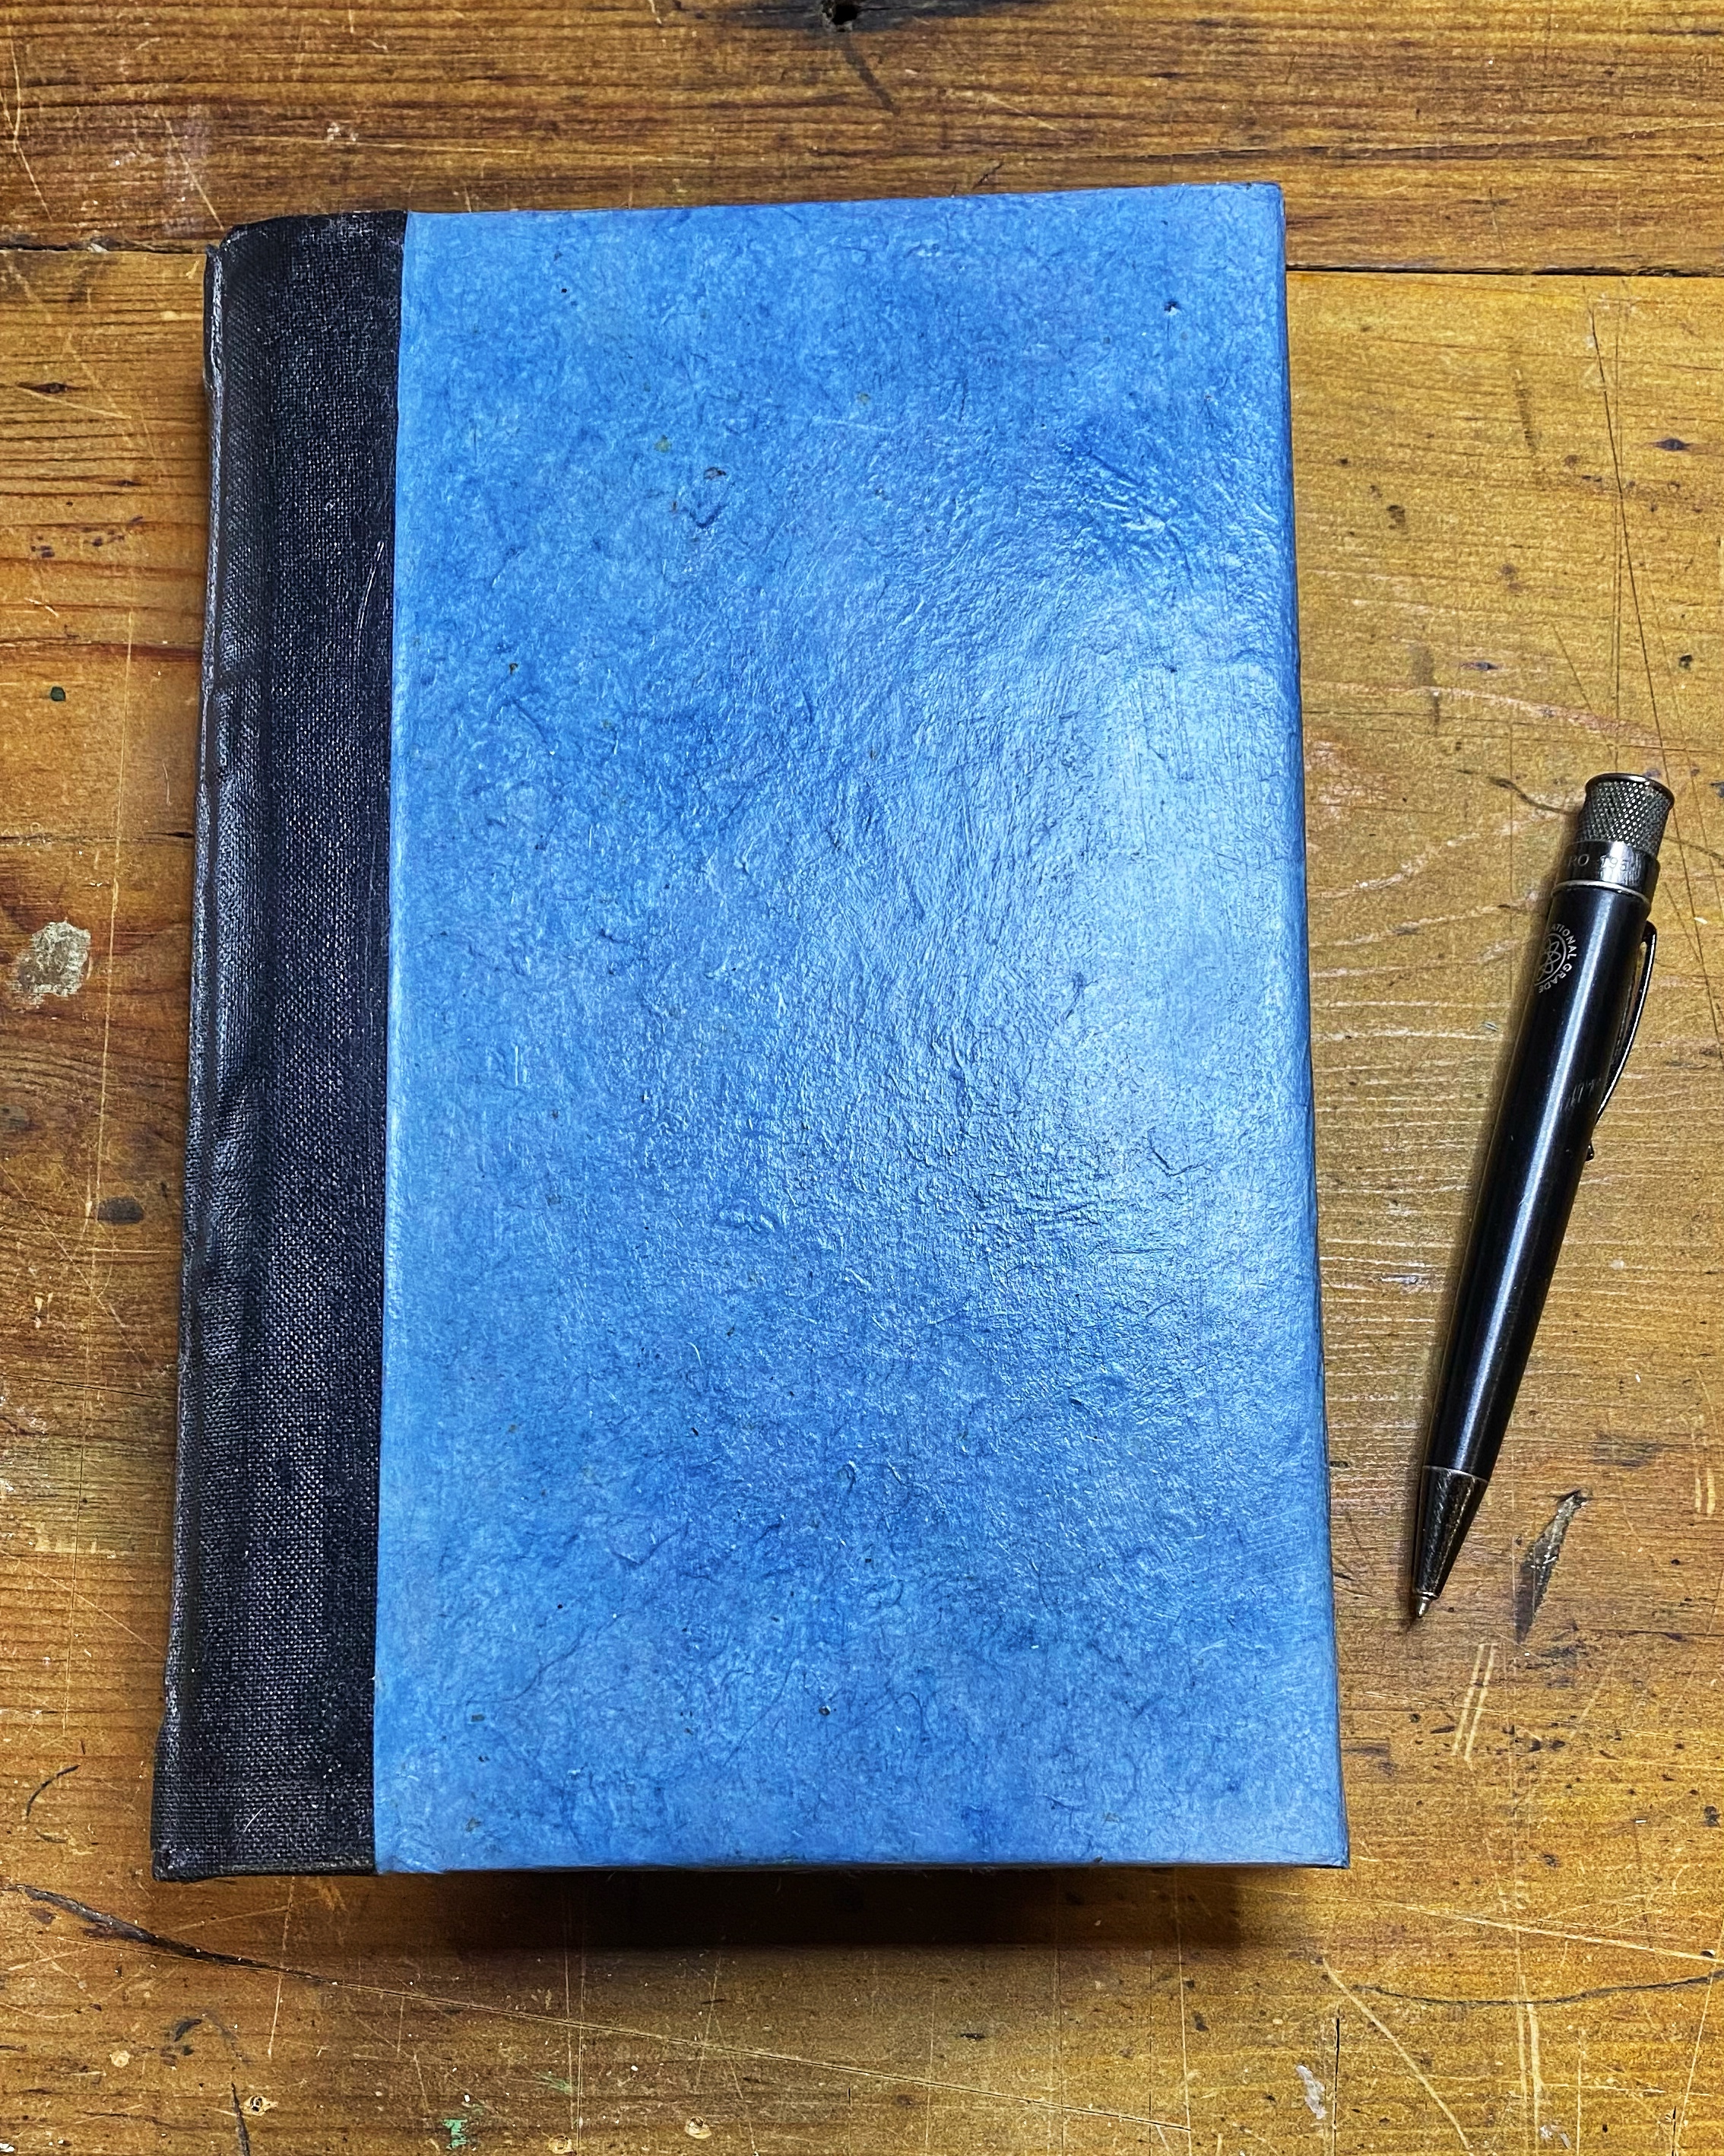
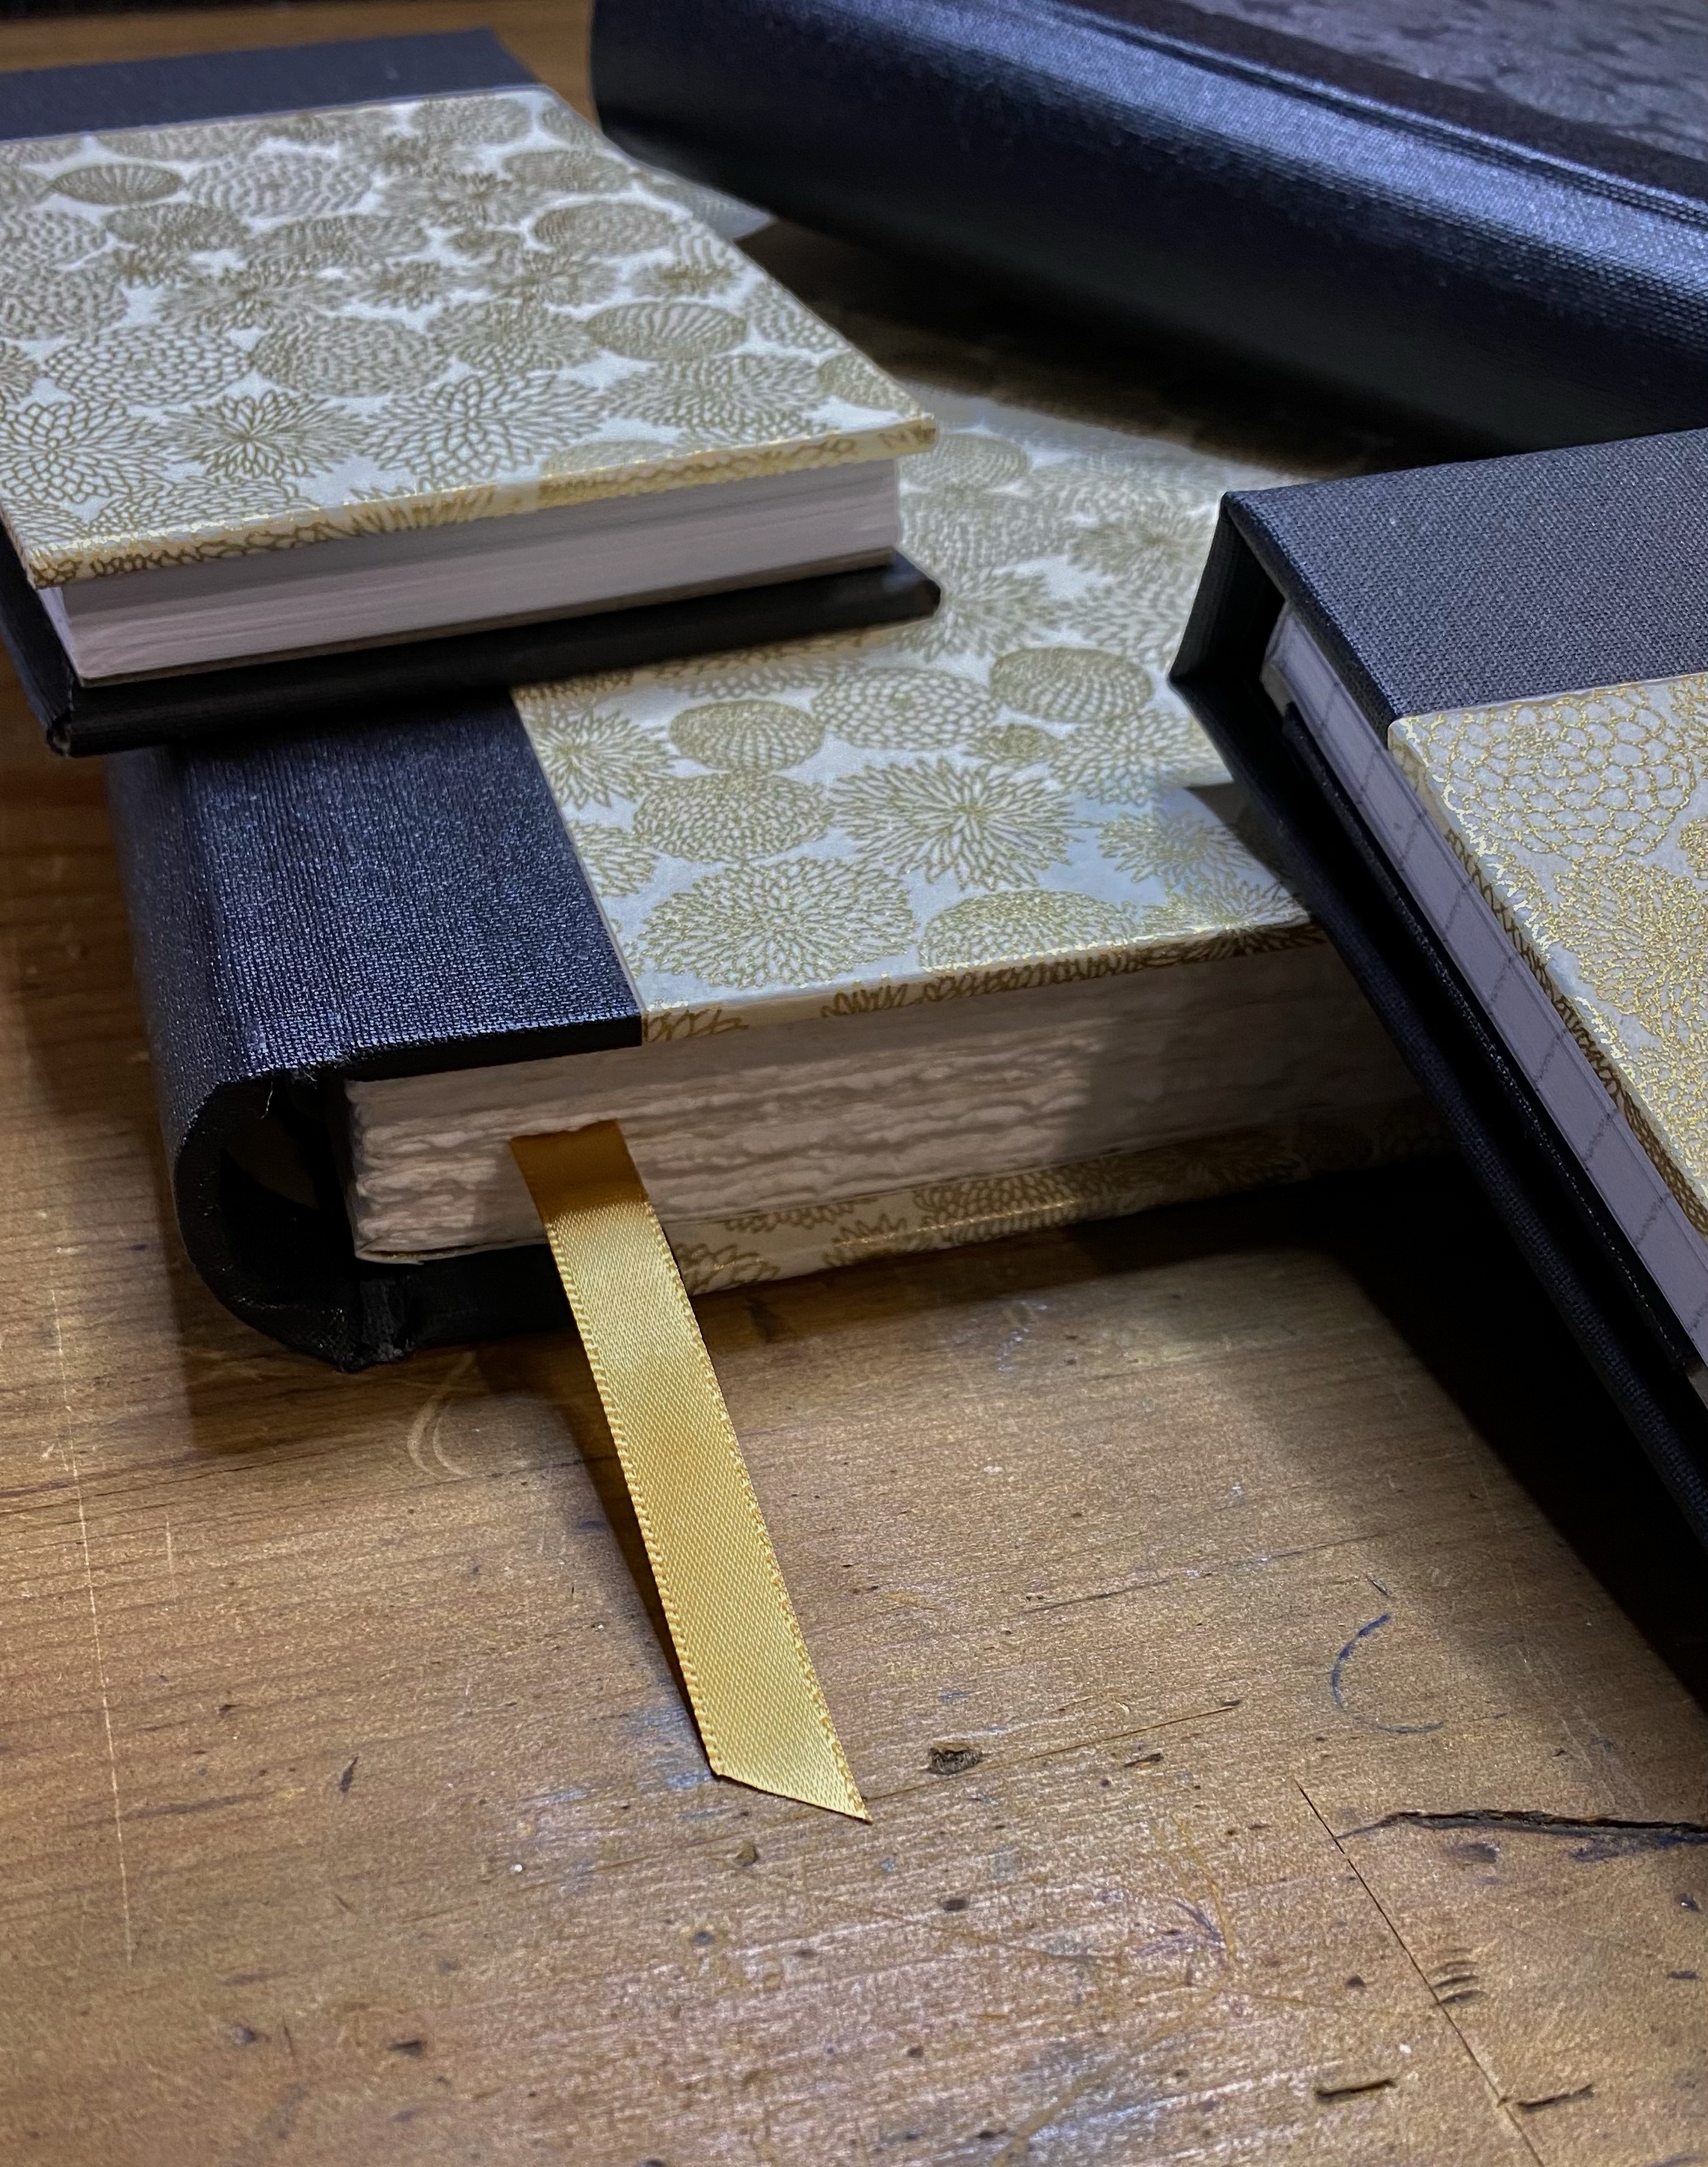
Project Blue Book

Project Blue Book

The book in the photo shown above is a A5 tape bound hand sewn journal. It features a waxed indigo blue lokta paper cover.

We’ll use this book as an example of the waxing process. 

We’ve put together a paper waxing kit which is available from our Etsy store 

The waxing kit contains a can of the Gilly Stephensons Cabinet Makers Wax as well as 2 150mm polishing pads and a buffing brush 

The Waxing Kit

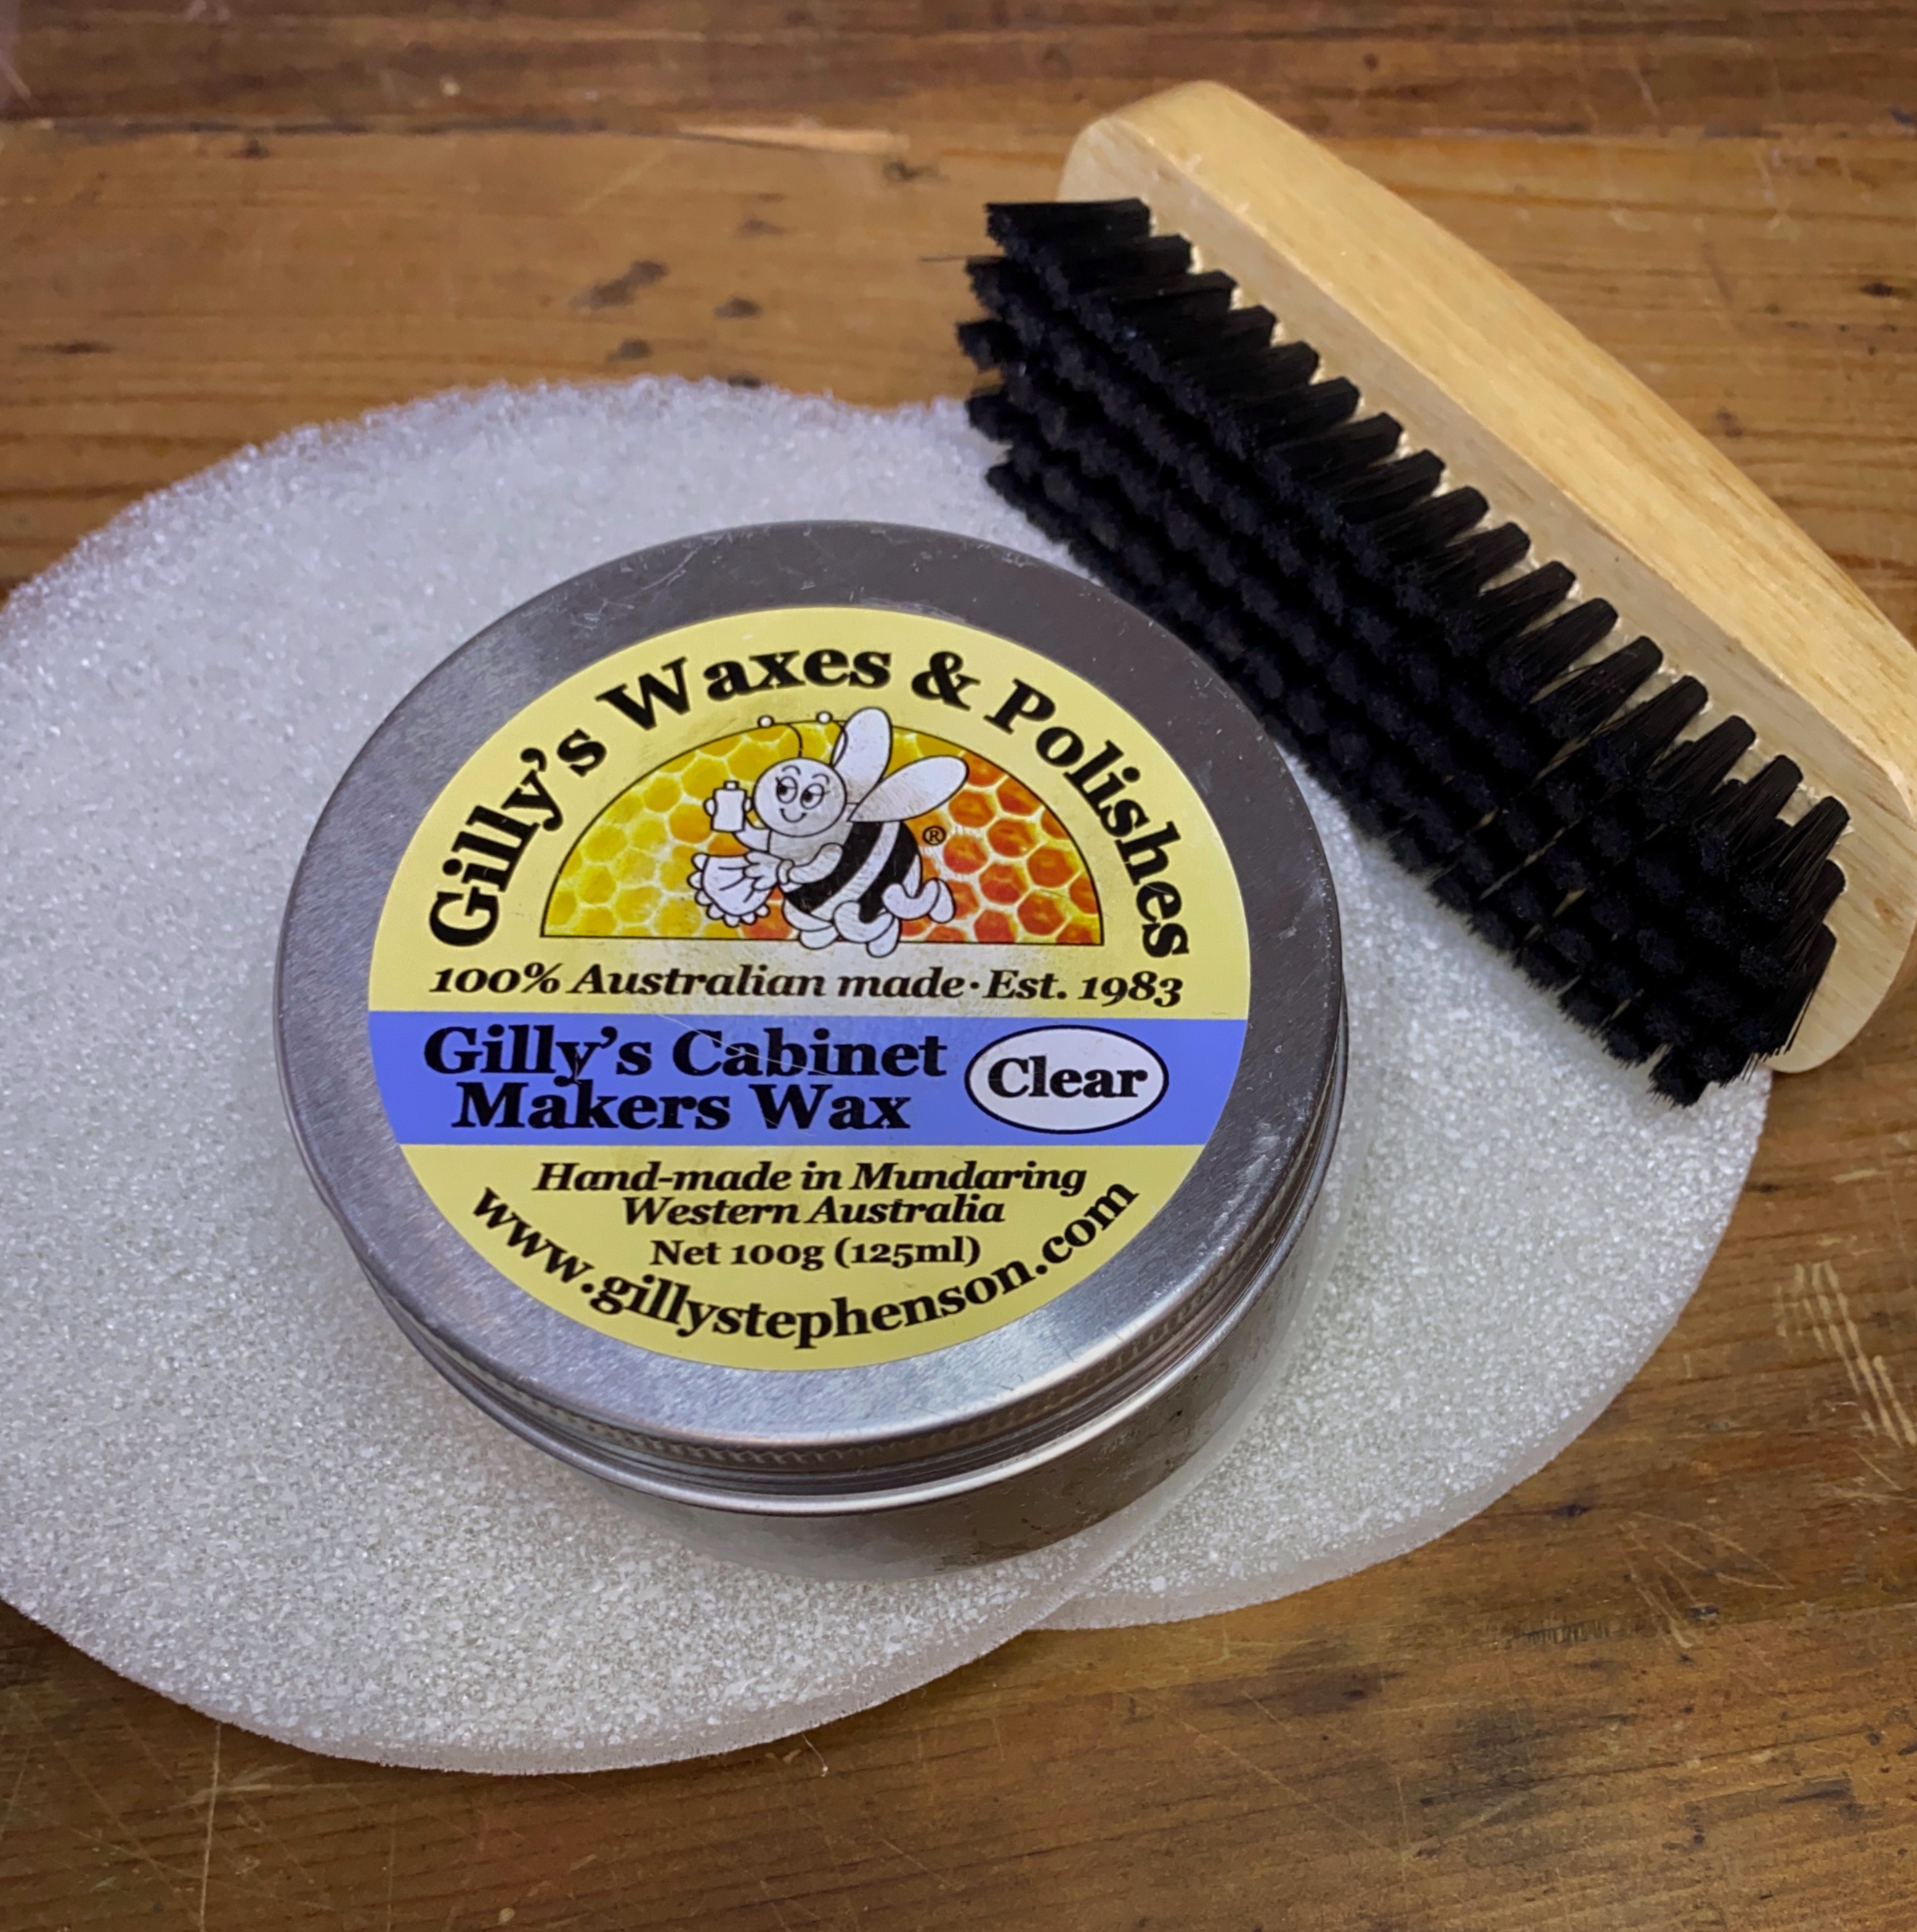
To begin the process you’ll need a piece of cotton cloth to apply the wax to your piece. I use a piece of old cotton beset cut into a piece about 8 inches square.  Fold the cloth the gather a small amount of wax to the paper on your workpiece.  If you’re finishing a book cover with a book cloth spine as in the example shown here, you may wish to mask the spine to avoid getting the wax on the book cloth. 

Watch the video here for the first step of the process.

Keep applying small amounts of wax to the paper until the surface is covered with a thin coat t of wax.  Always remember, it’s better to apply a couple of thin coats rather than one thick coat.  This is one of those instances where less is more… 

When you’ve applied a thin coat to the paper let it cure for two to four hours, then use one of the white polishing pads to rub back the excess wax from the surface of the paper. Use light stroke with not too much pressure to bring the surface up.  As you progress you should begin to see the surface develop. Apply a second coat of wax to the surface then leave it it for around six hours . 

When the wax has cured buff the surface lightly with the white pad, then switch to the buffing brush and using gentle but rapid strokes, buff the covers of the book

Watch the third video here fore more details on the technique: 

That should about cover it.  Please don’t hesitate to contact me if you have any questions about the content shown here. 

Tutorwood Books is Here!!!!

Tutorwood books is a small-business I run with my daughter Emily.. We make and sell beautiful notebooks, journals, and sketchbooks for artists.

Text Blocks to suit our popular side and top fold notebooks

Why, you may ask?

I’ve written extensively over the last few years, both for work and for blog sites such as this one. Whilst I do use computers daily I have always put my ideas and inspirations down on paper first prior to committing them to digital media. I think there’s nothing better to stimulate the creative juices than the feeling of a pen gliding over paper.

I’ll be updating the site site on a regular basis and posting images of new products, ideas, prototypes and general stuff.

Please visit our Tutorwood Books site on Etsy and be sure to follow us on Instagram

I’ve moved………


Hi All,

Just a short post to let you know that after over 10 years as Festool specialist at Just Tools, I’ve moved to a new position at Sydney Tools at their Blackburn. It’s great to be finally working for a company that appreciates your knowledge and abilities.

For the service, you’re used to, and the knowledge to help you get the best from your tools call me at the Blackburn branch or email me directly on bryans@sydneytools.com.au

Check out the massive Sydney Tools Website here:  

And the Festool Shop at Sydney Tools here:

Anything you used to get from me at Just Tools I get for you at Sydney Tools.

Get in touch and I look forward to helping you out

Cheers

Bryan


Tutorwood Cooks – Pork, Leek, Apple and Sage Sausage Rolls

DSCN0019

Tonight’s dish is one to do when you’ve got a bit of time up you’re sleeve as there are a couple of elements to prepare if you’re going to make it from scratch as I did here. I only have a small oven and can cook 16 sausage rolls at a time. Each batch takes about 40 minutes to cook so if you have a full-size oven, you’ll get it done quicker. This recipe makes a total of 48 sausage rolls.

Pour yourself a wine, put on the slippers and let’s get into it.

Ingredients:

Pork Mince                            1 kg

Bacon                                      200gram sliced

Leeks                                       2 large, finely sliced

Chilli                                        1 red, 1 green finely sliced

Garlic                                       6 cloves, smashed

Continental french

onion soup mix                      1 pack

Sage                                          1 tablespoon Fresh chopped.

Eggs                                          4 medium to large

Butter                                        2 tablespoon

Olive Oil                                    2 tablespoon

Stewed Apple                           1 cup, either homemade or storeboughtDSCN0003

Salt                                              1/3 teaspoon

Black Pepper                             1/2 Teaspoon

Puff pastry                                6 sheets

Panko Breadcrumbs.               1/2 cup

Parmesan Cheese                     1/2 cup

Milk 1/2 cup

Method,

  1. Finely slice the leek, chilli, and garlic then add a knob of butter and a splash of olive oil to a skillet then pan fry until translucent and the leeks have reduced by half.DSCN0004
  2. Remove from heat and allow to cool., ( I put the mix in the freezer for about 20 minutes to cool)
  3. In a large mixing bowl combine the pork, bacon, soup mix, 2 of the eggs, parmesan, breadcrumbs, sage, stewed apple and cooled leek mix. Add a touch salt and pepper to taste, then, use your hands to combine all the ingredients. Mix till evenly combined but don’t overmix; otherwise, the sausage rolls will end up tough.
  4. Get the puff pastry sheets from the freezer and separate on your bench and leave till soft enough to roll. I lay the pastry on the edge of my worktop and can tell when it’s ready to use as it flops over the edge DSCN0012
  5. Mix the remaining eggs and milk to form a glaze for the pastry.
  6. Lay a pastry sheet on a floured breadboard, then coat with the egg wash. Cut the sheet in half and place a roll of the meat mix. Place it along the centre of the pastry then roll with the joint on the bottom. Cut into four then place on in a baking tray lined with baking paper.DSCN0016
  7. Repeat until you’ve filled the baking dish then bake at 180º for 40 minutes or until golden brown.DSCN0017
  8. Serve with a green salad or enjoy them on their own

As always, feel free to tweak the recipe to make it your own.

Have fun and cook on!!

Cheers,

Bryan

Tutorwood Cooks – Simply Scrumptious Stir Fry

IMG_2183


Tonight’s dish is a simple, wholesome tasty meal, which with chopping the vegetables, can be on the table in about 20 minutes. The secret to its rapid preparation is to use a combination of fresh and frozen stir fry vegetables, microwave basmati rice and pre-prepared stir fry shots, which are brilliant flavour filled spice mixes. They take all of the guesswork out of making a tasty Asian meal.

You know the drill, comfy slippers, a glass of wine and let’s get into it.

 Ingredients;

Chicken Breast                                    600 gram finely sliced

Red Onion                                            1 finely sliced

Red Capsicum                                     1 finely sliced

Bok Choy                                             4 loosely chopped (include leaves)

Chillies                                                 2 Red, 1 Green, all finely sliced

Stir Fry shots                                      3 tubs, I used Vietnamese for this dish

Bean Shoots                                         1 x 150-gram can

Frozen Stir Fry Vegetables               1 x 500-gram pack

Fresh Ginger                                       1 tablespoon

Soy Sauce                                             2 tablespoons

Microwave Basmati Rice                  2 x 250-gram packs

Method;

The secret for getting this dish cooked quickly is in the preparation. You want to make sure everything is ready to go before you start cooking. I use stainless steel trays to hold the ingredients when I’ve sliced them. My method is to load the containers with the vegetables in the order I’m going to cook them.

IMG_2184

  1. Finely slice the chicken and season with one of the tubs of the spice mix.
  2. Slice the onion and chillies and place in the same tray as the chicken
  3. Open the frozen vegetables and put in another dish ready for cooking
  4. Chop the bok choi and capsicum and place together in another plate with the bean shoots.
  5. Heat the olive oil in a wok and stir fry the chicken in batches for about 3 minutes per batch until all cooked. Put aside and keep warm.
  6. Repeat the process with the frozen vegetables, remove and put with the chicken mix, then cook the bok choi, capsicum and bean shoots.


7. Combine all ingredients back in the wok, add the remaining spice packs, and a generous splash of soy sauce for extra taste. Cover and simmer on low heat while the rice cooks.

8. Cook the rice according to the packet directions, then serve and enjoy when it’s all ready.

As always, play with this recipe to make the taste and flavour your own. You can change the meat and use either pork, beef or seafood; it’ll work equally well with any of these meats.

Your comments and questions are always appreciated.

Have fun and cook on!!

Cheers

Bryan

Tutorwood Art -Watercolor Grey Butcher Bird

I’m enjoying the downtime of Easter and have been working on improving and further exploring my drawing and sketching skills.

Earlier this year I discovered a brilliant American artist Juliette Aristides, and I’ve been working through one of her excellent books, “Beginning Drawing Atelier.”

The lessons have empowered me with the skills to look at how I draw in a new way and not to get too tied up in planning a picture – just get on with it and draw the picture.

The image I’m posting here is another view of the young Grey Butcherbird which paid us a visit a few days ago. The last post was a coloured pencil sketch, this one is in watercolour pencil.

I hope you like it.

Cheers for now

Bryan

Tutorwood Cooks – Veal Tortellini with Mushroom and Spinach Sauce.

It’s Easter Sunday and after a productive day drawing, writing and general odds and ends, its time to think about dinner. Tonight will be a simple dish using a supermarket pre-made tortellini but pairing it with a homemade, mushroom, spinach and parmesan cream sauce

.

IMG_2168
Fresh Portobello Mushrooms

The secret is to slow cook the mushrooms in a mix of beef stock, garlic, onion, butter and paprika for 45 minutes to an hour to draw as much flavour out of the mushrooms as possible.

IMG_2170
Mushrooms, Onion, Garlic, Chilli’s simmering in beef stock with Paprika

When you’ve cooked the mushrooms, the dish will be ready to serve less than 1/2 an hour. You can skip slow cooking the mushrooms is you want to save time, then the plate will travel from stove-top to just on thirty minutes.

Right then, pour yourself a glass of wine, or in my case a bourbon and cola, and let’s get cooking.

Ingredients;

Portobello or Brown

Mushrooms,                                 1 kg sliced

Brown Onions                              2 sliced

Red Chilli                                       1 sliced

Green Chilli                                   1 sliced

Garlic Powder                              1 tablespoon

Paprika                                          2 teaspoons

Beef Stock                                      2 cups

Parmesan Cheese                         200 gram

Cooking Cream                             2 x 300ml tubs

Dijon Mustard                              1 teaspoon

Green Spinach                             1 x 120-gram pack

Veal tortellini                               1 x 600-gram pack

Method;

  1. Slice the mushrooms, chillies, and onion and simmer in a large skillet with the garlic, stock and paprika. Bring to a boil and simmer for 30 to 45 minutes, stirring occasionally.
  2. Bring a saucepan with 6 litres of salted water to the boil in preparation for the pasta.
  3. To the mushroom, mix pour in the cream and parmesan and simmer on low heat for 6 minutes
  4. Add the tortellini to the boiling water and cook for 6 minutes or until cooked to your preference.
  5. Just before the pasta is ready, add the spinach leaves to the sauce and stir well.

    IMG_2171
    Fresh Spinach added to the Sauce
  6. Use a slotted spoon to remove the tortellini from the saucepan and let simmer for 5 minutes before serving.

    IMG_2172
    Adding the Pasta to the sauce
  7. Serve with garlic bread and a green salad.

I hope you enjoy this recipe and remember to play with the ingredients to make this recipe your own.

Have fun and cook on!!!

Cheers

Bryan

Tutorwood Art – Grey Butcherbird

We had a young Grey Butcherbird come and visit us yesterday while we were gardening. I snapped a couple of shots on my phone and spent a few hours this morning working up a rough coloured pencil sketch.

For my first attempt at sketching birds, I’m happy with the result

Anyway, I hope you like them.

Cheers

Bryan

Tutorwood Cooks – Epic Chicken, Leek & Tarragon Pie

Today’s recipe is something a bit more special. As it’s Good Friday and everything’s closed and even if there was something open we shouldn’t go there because we’re in Stage 3 lockdown here.

So what better thing to do than bake a pie. This chicken pie is a tasty dish with layers of starting with the bacon and climaxing with the goat cheese and tarragon. Give yourself a good two hours to prepare and cook this dish, but I promise you it’s well worth the effort.

Put your slippers on, pour yourself a wine and let’s get into it.

IMG_2136
The Ingredients.

Ingredients:

Chicken Breast                           approx 600gram sliced

Bacon                                          250 gram sliced

Leek                                             1 large, sliced

Brown Onion                              2 medium sliced

Red chilli                                      2 sliced

Green Chilli                                 1 sliced

Green beans                                200 gram, top and tailed

Continental Cream of

Mushroom Soup                        1 x 420 gram can

Continental french

onion soup mix                         1/2 pack

Plain Flour                                  2 Tablespoons

Goat Cheese                                2 x 100-gram packs

Master foods Garlic

and Rosemary                          2 heaped teaspoon

Tarragon                                     2 tablespoon – can be fresh or dried

White Wine                                2 cups

Puff Pastry                                  4 to 6 sheets, thawed (depending on the size of your pie dish)

Eggs                                              2 whisked, (for egg wash)

Butter                                            2 tablespoons

Olive Oil                                        3 tablespoon

Method:

Before you start cooking separate six sheets of puff pastry from the pack and put aside to thaw.

  1. Melt one tablespoon of butter, and a splash of olive oil in a large skillet and brown the leek, onion and chillies for about 4 minutes.
  2. Add the chicken and bacon, then brown until golden.
  3. Add the soups, both can and packet, herbs, white wine, garlic and goat cheese, cover and simmer for about 15 minutes. Add the flour to the sauce and stir until well mixed and the mix has thickened. Turn off and uncover to cool when completed.

    IMG_2137
    The Cooked Filling
  4. While the filling is simmering, grease your pie dish and using 2 to 3 sheets of puff pastry cover the base of your pie dish. The pie dish featured is a 32cm falcon enamel pie dish which needed three sheet’s of puff pastry to cover. Remember to apply the whisked egg to all the overlapping areas of puff to ensure they stick together.
  5. We’re going to blind bake the pastry crust which helps prevent the dreaded soggy bottom of the pie. You can skip this step is you want, but I think when you’re eating it, a crispy base is preferable to the alternative. To blind bake, give the pastry a spray with some olive oil, then cover completely with aluminium foil. Fill the interior with rice or dried beans and bake for 15 minutes at 200º Celcius. When finished, tip out the rice, (you can still use it) remove the foil and put aside to cool.

    IMG_2139
    Preparing to blind bake the crust.

    IMG_2141
    The Blind Baked Crust.
  6. When the pastry and chicken mix has cooled, ladle a layer of the filling into the pie dish then add the green beans and scoop the rest of the chicken into the pie dish. Use a pastry brush and apply a generous coat of the egg wash to the pastry edge to allow the top to stick to the crust. Cover the dish with the remaining pastry, press down the edges firmly with a fork, then trim off any excess pastry. Go over the top of the pastry top with the egg wash.

    IMG_2143
    The Crust, 1/2 filled and the bean layer.

    IMG_2146
    Filled, with the lid on, and decoration of a leftover sheet of pastry stuffed with parmesan added.
  7. Bake at 200º Celcius for 40 minutes then let it rest for five minutes before serving.

    IMG_2155
    Finished!!!!

Serve direct from the pie dish as there’s a good chance it will collapse if you try to tip it out.

I hope you enjoy this dish and don’t be afraid to play with the ingredients to put your stamp on it.

Have fun and cook on.!!!!

Cheers,

Bryan

Tutorwood Cooks – Creamy Chicken and Bacon Stroganoff

Today’s feature is another family favourite and, it also falls into the quick and easy after-work category. With plump juicy chicken pieces, the smoky flavour of the bacon and plenty of mushrooms and beans, the tartness of the sour cream and lemon juice this dish, to me, is one of the best comfort food dishes ever. This dish also works exceptionally well with either beef strips, beef mince, pork, pork mince or even chicken mince.


IMG_2112
The Raw Ingredients

Tonight we’ll be having the dish with spiral pasta, but it works equally well over rice or the Glorious mashed potatoes, I featured earlier this week. Another great idea is to make the dish without adding the chicken or beans and use it as a sauce over a beautiful piece of steak.

IMG_2113
Chicken and Bacon with Garlic Scapes – Ready to cook

To me, this dish shines as it’s a prime example of how with a straightforward recipe base, you can create a whole range of different meals.

Now; let’s get cooking:

Ingredients

Chicken Breast                              1 kg chopped

Bacon                                              250 gram

Brown Onion                                 1 sliced

Red Chilli                                        1 sliced

Garlic Scapes                                  6 to 8 or 4 cloves of garlic smashed

Mushrooms                                    300 gram sliced

Continental French Onion

soup mix                                          1 pack

Green Beans                                     250 gram sliced, (either fresh or frozen)

Worcestershire sauce                     1 tablespoon

HP Steak Sauce.                               1 tablespoon

Paprika                                              1 tsp

Cream of Mushroom Soup             2 x 250ml can

Mayonnaise                                       1/2 cup

Sour Cream                                        1 small tub

Lemon juice                                       3 tablespoon

Salt                                                       1/2 teaspoon

Black Pepper                                      1/2 teaspoon

Directions

1. Pan fry chicken bacon and onion garlic and chilli in a large skillet until no longer pink. Drain Oil.

IMG_2114
Pan-frying the onion and chilli

2. Add all other ingredients to skillet and simmer on low for 15 to 20 minutes, stirring occasionally

3. Stir through sour cream before serving

IMG_2116
Ready to add the sour cream

4. Serve over pasta, rice or mashed potato

I hope you enjoy this meal and feel free to drop me an email to let me know what you thought and how you made it your own.

Have fun and cook on !!!

Cheers

Bryan

Create a free website or blog at WordPress.com.

Up ↑